How to Install a 4 Post Car Lift: Step-by-Step Guide (2026)
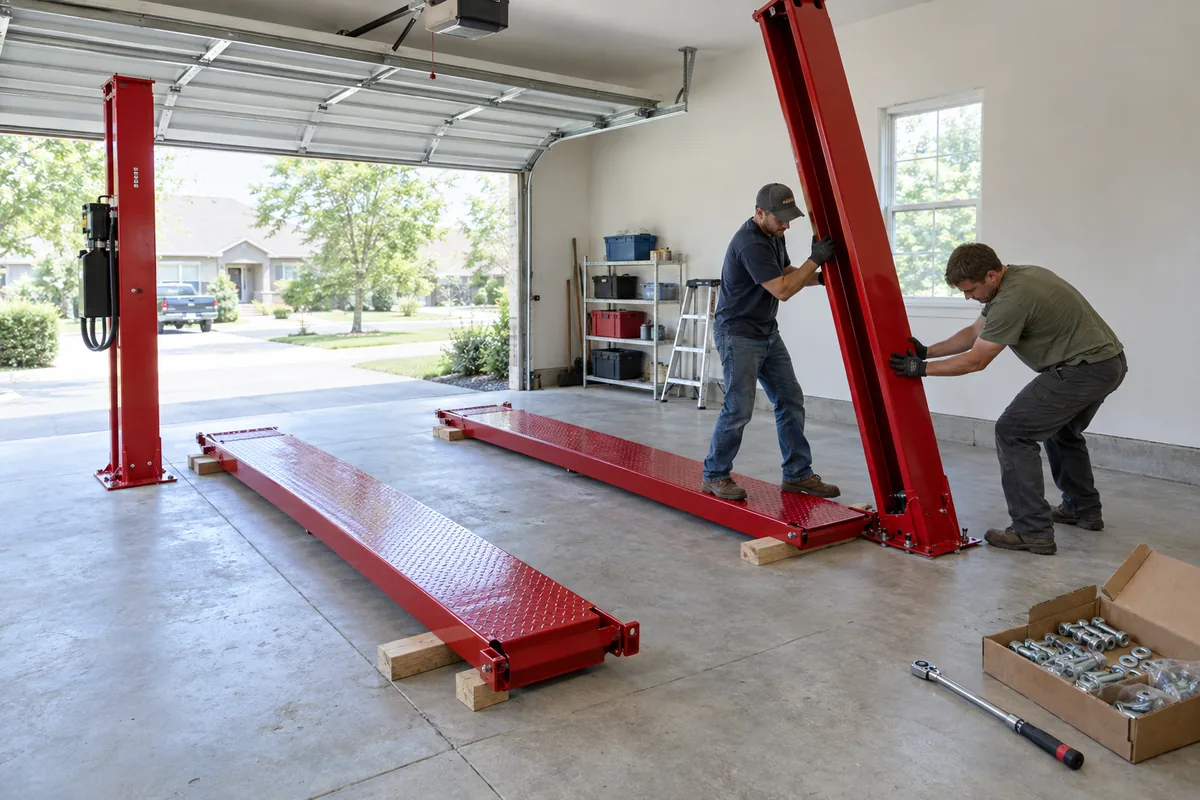
So the truck finally showed up. A pallet of red steel, two runways the length of a small boat, a hardware box that weighs more than your toolbox, and a manual that assumes you already know what you are doing. Now you want to know how to install a 4 post car lift without wrecking the lift, your floor or your back.
I have put together more four post lifts than I can count, from budget 8,000 lb storage lifts to 14,000 lb service racks, and the process is nearly identical every time. It is not hard. But it is heavy, it is unforgiving of shortcuts, and the order you do things in matters more than most people expect.
In this guide I will walk you through the complete 4 post car lift installation, from checking your concrete and ceiling to the first load test. I will tell you which numbers to hit, which mistakes I see over and over, and when it is smarter to pay a professional installer.
Quick Answer: To install a 4 post car lift, confirm your slab is at least 4 inches of 3,000 PSI concrete and your ceiling clears the lift plus your tallest vehicle, chalk the footprint, stand the four posts with the crossbeams finger tight, set the runways, route the four equalizer cables over the sheaves, connect the hydraulic cylinder and power unit, fill and bleed the system, plumb and shim each post, adjust the cables so all four safety locks click at the same time, then test the lift empty before loading a vehicle. With two or three people and the right tools, plan on 4 to 8 hours.
Also Check:
- Best 4 Post Car Lift for the Money – Reviews & Buying Guide
- Does a 4 Post Car Lift Need to Be Anchored? The Ultimate Guide
- Best Two Post Lift to Buy – Reviews & Guide
Can You Install a 4 Post Car Lift Yourself?
Yes, most home garage 4 post lifts (7,000 to 9,000 lb storage and service lifts) are designed for owner installation. The manufacturer ships them with installation instructions, shims and, on most models, concrete anchors. The catch is the weight. A typical lift ships at 1,500 to 2,200 lbs and a single runway can weigh 400 lbs, so this is never a one-person job.
Here is my honest rule of thumb:
- DIY is realistic if you have two or three helpers, an engine hoist or forklift to move the runways, basic mechanical skills and a full day.
- Hire a pro if the lift is a commercial alignment rack, if your slab is questionable, if the manufacturer requires certified installation for warranty coverage, or if you simply do not have the manpower.
- Always hire an electrician for a new 220V circuit. Most manuals require a licensed electrician for the power connection regardless of who assembles the lift.
If you have not bought a lift yet, start with our roundup of the best 4 post car lifts so you buy a model that actually fits your garage before you learn the hard way.
4 Post Car Lift Installation Requirements
Ninety percent of failed installations are decided before the pallet is opened. Check these four things first.
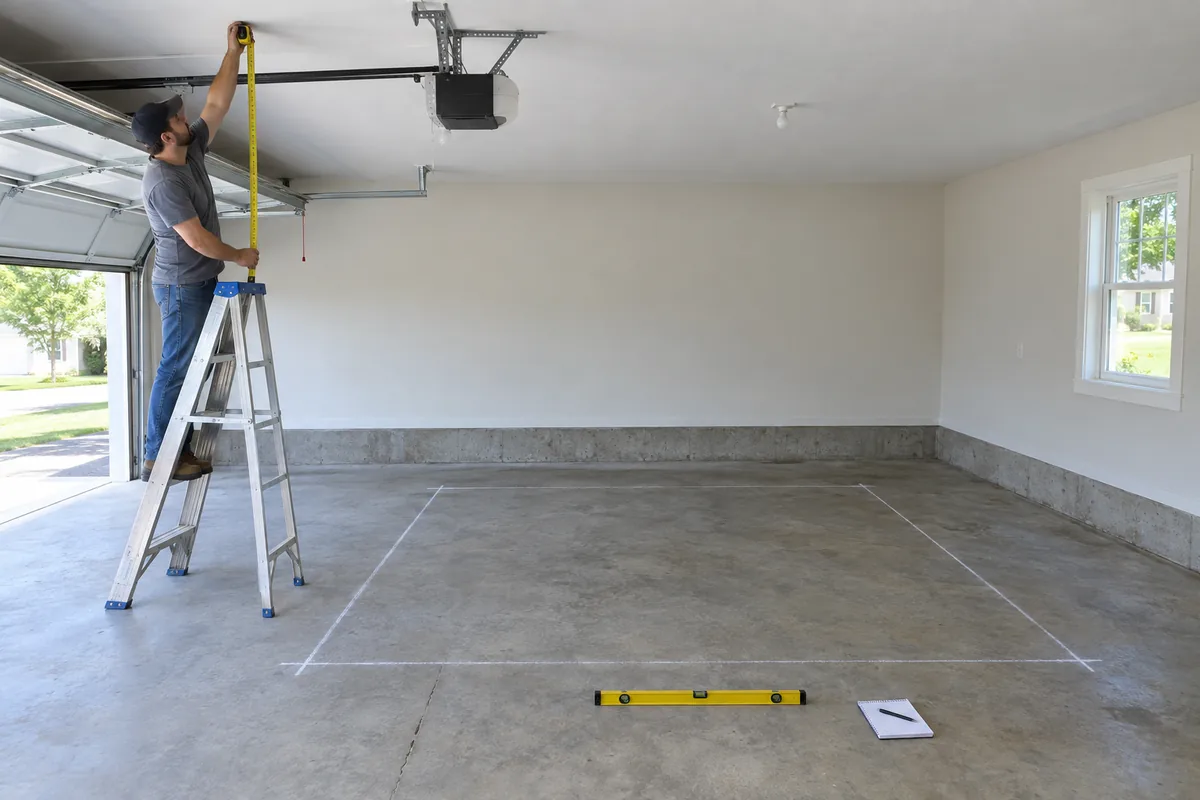
Ceiling Height
Measure the true clear height at the lowest obstruction, not at the peak of the ceiling. Garage door tracks, opener rails, light fixtures, sprinkler heads and ducting all count. Then do the math: clear height minus the tallest vehicle you will park underneath, minus runway thickness (about 5 to 6 inches), minus a few inches of breathing room equals your usable lift height.
In practice, a standard 72 inch storage lift needs roughly 11 to 12 feet of clear ceiling to stack two normal vehicles. Many standard 4 post lifts with a post height around 7 feet 8 inches will physically fit under a 9 or 10 foot ceiling, but you will not be able to raise a car all the way and park a second one underneath. Extra tall models need 12 to 14 feet.
Concrete Slab
Most manufacturers require a minimum of 4 inches of 3,000 PSI concrete for residential capacity lifts, cured at least 28 days. BendPak, for example, specifies 4.25 inches, 3,000 PSI and a maximum floor slope of 3 degrees for its HD-9 series, and prohibits installing within 6 inches of cracked or defective concrete. Never install on asphalt, pavers or a post-tension slab without an engineer’s approval.
If you are not sure how thick your slab is, drill one test hole where a post will sit before assembly day. A garage poured in the 1970s might be 6 inches thick or 3 inches over gravel with no rebar. Finding out on installation day is expensive.
Floor Space
A typical home 4 post lift is 14 to 18 feet long including ramps and 8 to 10 feet wide outside the posts. Add about 2 feet on each side to open car doors and work comfortably, at least 3 feet at the drive-off end, and enough straight approach room to drive onto the runways without angling in. Chalk the footprint, park your vehicles inside the lines and open every door before you commit.
Electrical Power
Most home lifts run on a 110V or 220V single-phase power unit. A 110V unit will plug into a standard outlet but should still be on its own circuit; a 220V unit needs a dedicated 20 to 30 amp circuit installed by a licensed electrician before installation day. Never share the lift circuit with an air compressor and never run the power unit from an extension cord. The motor will brown out under load and cook the contactor.
Tools You Will Need to Install a 4 Post Lift
Gather everything before the pallet arrives. Nothing kills momentum like a parts run in the middle of standing posts.
- Rotary hammer drill with a 3/4 inch carbide masonry bit (for anchoring)
- Torque wrench rated to at least 100 ft-lbs
- SAE and metric socket set, open-end wrenches and hex keys
- 4 foot level and a 2 foot level (or a laser level)
- 25 foot tape measure and a chalk line
- Crowbar, hammer and needle-nose pliers
- Two sawhorses or wood blocks to stage runways
- 12 foot step ladder
- Engine hoist, forklift or pallet jack for moving runways
- Shop vacuum or compressed air for cleaning anchor holes
- 3 to 4 gallons of approved hydraulic fluid (AW-32/ISO-32, AW-46/ISO-46 or Dexron ATF per your manual)
- Leather gloves, safety glasses and steel toe boots
If you do not own an engine hoist, borrow or rent one for the day. Walking a 400 lb runway with four people is possible, but it is how fingers get pinched and paint gets scratched.
How to Install a 4 Post Car Lift: Step-by-Step
Your manual is the final authority for your specific model, and if anything below conflicts with it, follow the manual. That said, every 4 post lift I have installed follows this same sequence.
Step 1: Unpack and Inventory Everything
Before you cut a single strap, photograph the pallet from all sides and compare it to the packing list. Bent runway edges, crushed cartons and missing hardware bags need to be noted on the bill of lading before the driver leaves. Once you sign clean, damage becomes your problem.
Then stage the parts in the order you will need them: posts and crossbeams first, runways second, ramps, jack tray and accessories last. Do not stack a runway on top of the hardware box you will need in twenty minutes.
Step 2: Mark the Layout on the Floor
Snap chalk lines for the outside edges of all four base plates using the dimensions in your manual. Decide now which corner will be the power side post, because the power unit, hydraulic hose and control location are all fixed by that choice. Most people put the power unit on the driver side at the rear so the controls are reachable from the drive-up side.
Step 3: Assemble the Posts and Crossbeams
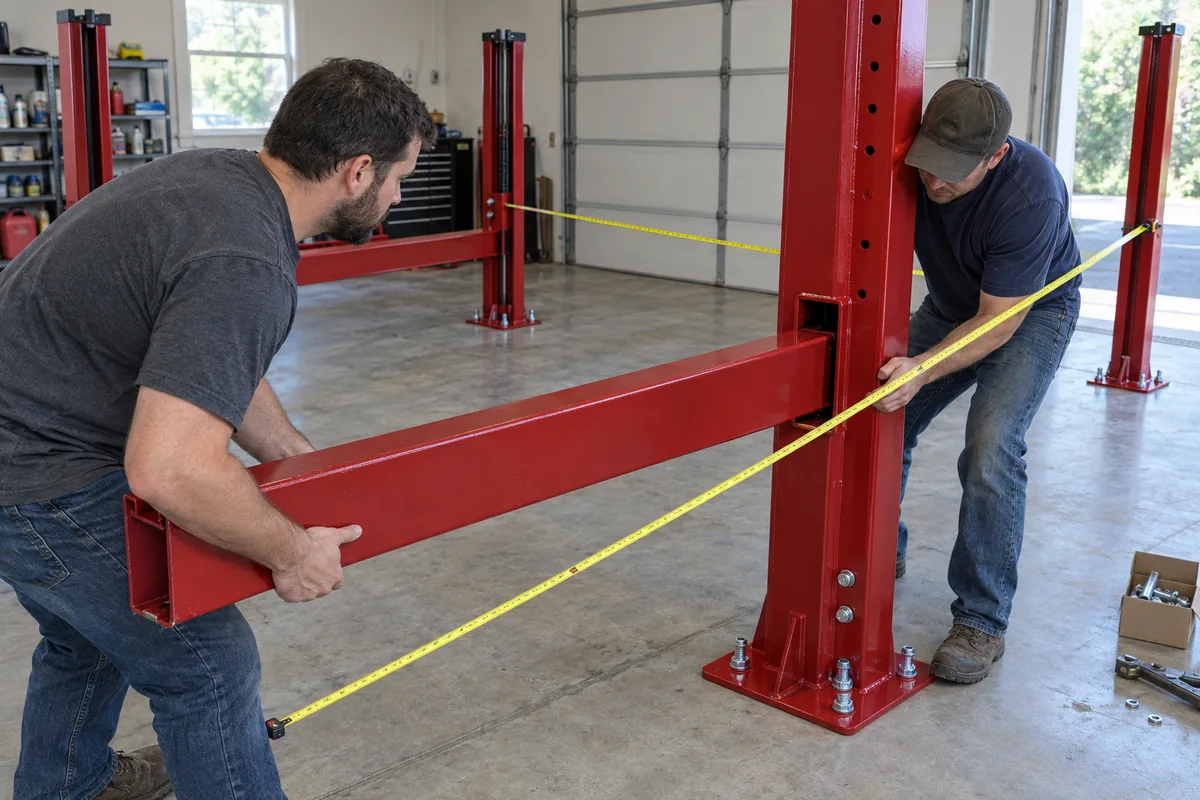
Stand the first two posts on their chalk marks and slide the crossbeam through the slots in the posts. On most lifts three posts are identical and one is the power side post with the extra bracket for the power unit, so check which is which before lifting. Some manuals have you lay the crossbeam on wood blocks and walk the posts onto it, others have you raise the crossbeam into standing posts; do whatever your manual shows.
Install the top caps, slider blocks and safety lock ladders as your manual directs, then repeat for the second crossbeam. Leave every fastener finger tight. If you torque the frame now it will lock in as a parallelogram and the runways will not fit.
Measure diagonally from corner to corner in both directions. When both diagonals match within about 1/8 inch the frame is square, and only then should you snug the hardware in the sequence your manual specifies.
Step 4: Set the Runways
The runway with the hydraulic cylinder and cable sheaves is the power side or main runway. It goes on the same side as the power unit post and it is always installed first. Lift it with your hoist or forklift, set it on the crossbeams and bolt it down. Then set the second runway. Many lifts let you adjust the spacing between runways to suit narrower or wider vehicles, so measure your vehicles’ track width before you tighten.
Install the approach ramps, wheel stops and any drip trays or jack tray now while the lift is low and easy to reach.
Step 5: Route the Equalizer Cables
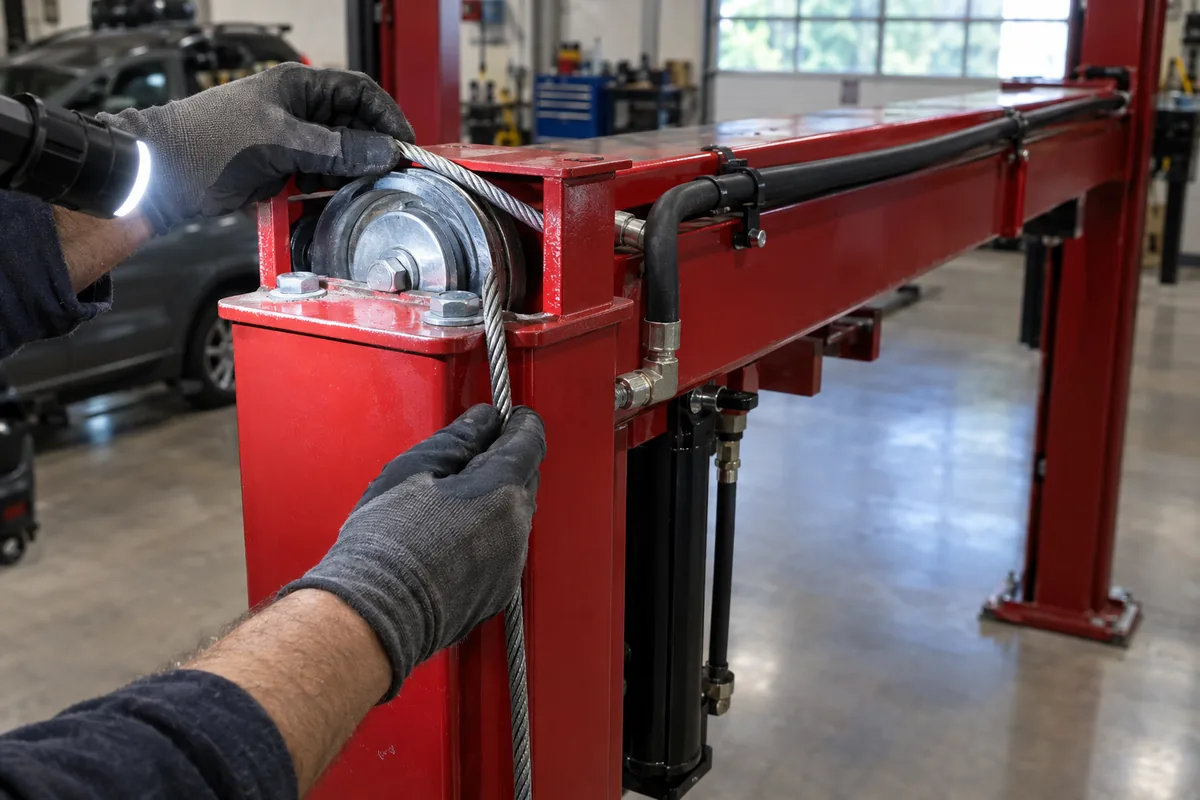
Every 4 post lift uses four steel lifting cables of different lengths. Lay them out and measure them against the cable routing diagram before you touch a sheave. Each cable runs from an anchor point in the main runway, over the sheaves inside the crossbeams and up to the top of one post where the threaded end is secured with a nut and washer.
Take a flashlight and trace every cable from end to end. It must ride in the groove of every sheave, not on a flange, with no crossed runs, no skipped sheaves and no rubbing on a frame edge. A cable that jumps a sheave under load will fail. Hand tighten the top nuts for now; final adjustment comes later.
Step 6: Install the Hydraulic Cylinder, Hose and Power Unit
Depending on the design, the hydraulic cylinder mounts inside the main runway or beneath a crossbeam. Bolt the power unit to its bracket on the power side post, then run the hydraulic hose from the power unit to the cylinder, routing it so it cannot be pinched, kinked or stretched at any point in the lift’s travel. Use the fittings supplied with the lift and thread sealant only where the manual says to.
Connect the air line for the safety lock release if your lift uses one, and have your electrician make the final power connection. Do not run the pump dry even for a second.
Step 7: Fill the Reservoir and Bleed the System
Fill the reservoir with the fluid your manual specifies. Most take 3 to 4 gallons of ISO-32 or ISO-46 hydraulic oil, and many also approve Dexron III or Dexron VI ATF. With the runways fully lowered, run the lift up a foot or two and back down. Repeat up to six times with a minute or two of rest between cycles so the motor does not overheat. Most cylinders are self bleeding; the lift is done bleeding when it rises smoothly and quietly instead of jerking, groaning or squeaking. Top off the reservoir when finished.
Step 8: Level, Plumb, Shim and Anchor the Posts
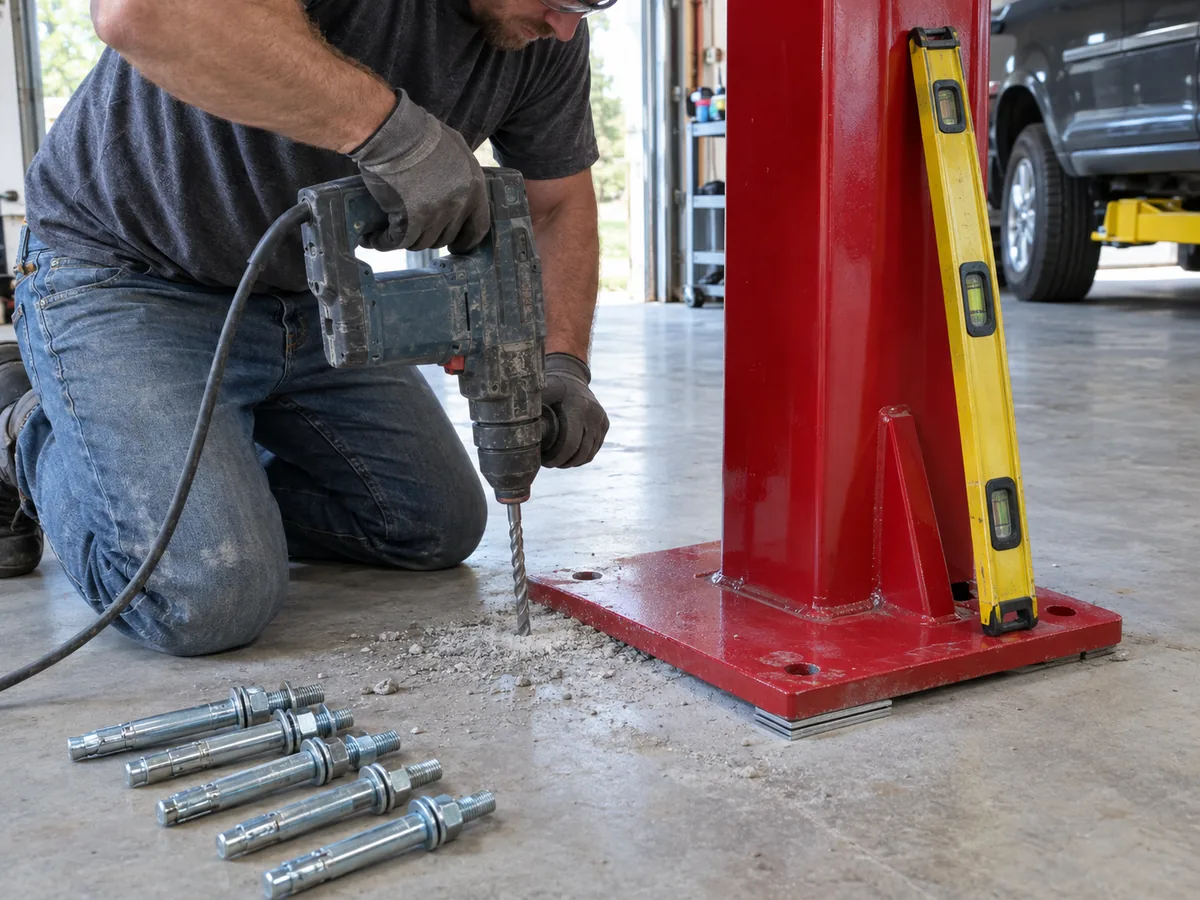
Raise the runways to the first lock position and check the runways for level front to back and side to side with a laser or long level. Garage floors are almost always pitched toward the door for drainage, so expect to shim the front posts. Use only the steel shims supplied with the lift under the base plates, never wood or stacked washers, and stay within the maximum shim height in your manual. Then put a 2 foot level on two faces of each post and adjust until it is plumb. A post leaning even 1 to 2 degrees will bind the slider blocks and wear them out early.
Now anchor. Drill through the base plate holes with a 3/4 inch carbide bit to the depth specified (do not drill through the slab), vacuum every hole clean, and drive the supplied wedge anchors. Torque them with a hand torque wrench, not an impact, to the manual’s value. BendPak specifies 85 to 95 ft-lbs for its 3/4 inch anchors and never less than 80 or more than 105. If you are unsure whether your lift needs anchoring at all, read our full guide on does a 4 post car lift need to be anchored.
Step 9: Adjust the Cables and Safety Locks
This is the step that separates a lift that feels solid from one that scares you. Raise the lift a few inches above a lock position and lower it onto the locks. All four safety locks must engage at the same height at the same time. If three drop in and one hangs, tighten the cable nut at the top of that post in small increments. A quarter turn moves more than you think.
Repeat the check at several heights, not just one, because cable stretch is not perfectly even. When all four locks click together at every height, tighten the jam nuts and torque all the structural hardware to spec. Remember that the locks are the safety system; the hydraulics raise the lift but should never be what holds a vehicle in the air.
Step 10: Test the Lift Empty, Then With a Vehicle
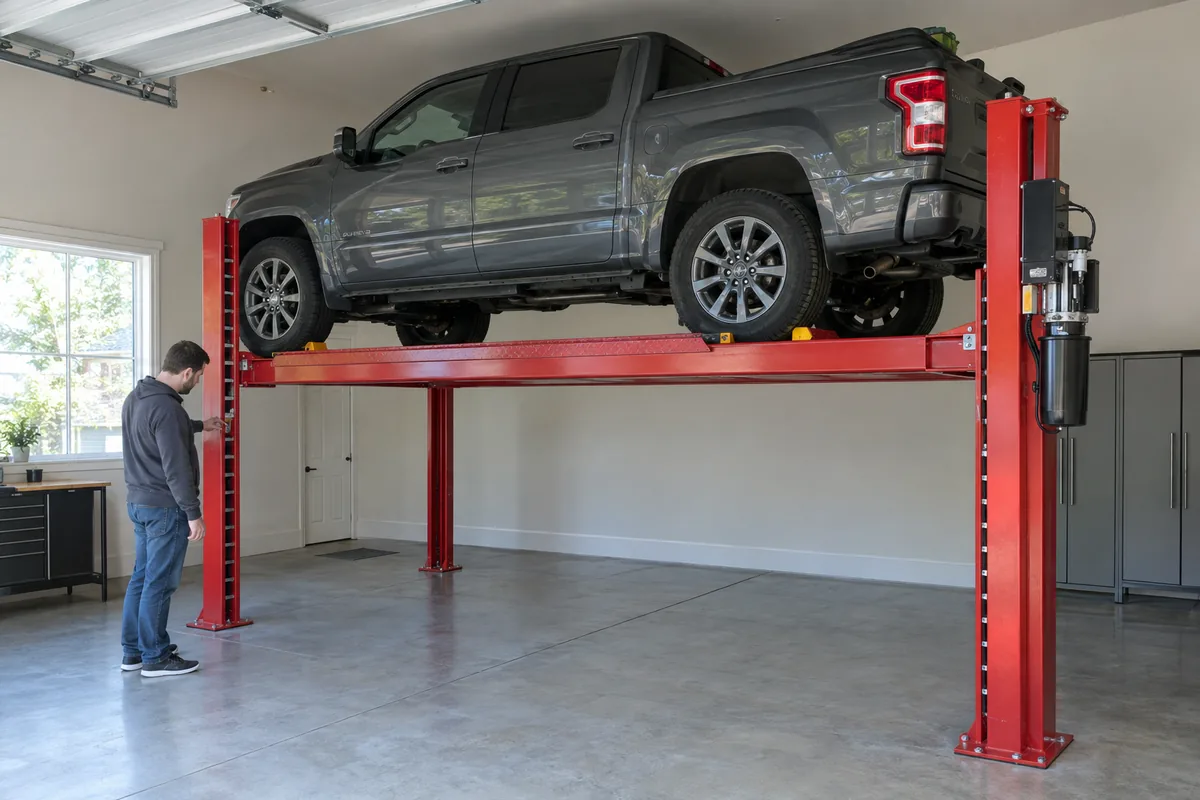
Run the empty lift from bottom to top three or four times. Listen for scraping, watch every sheave turn, confirm the runways stay level and that the lift stops cleanly on every lock step. Check the hydraulic fittings for weeping and top off the fluid.
Then drive a lighter vehicle on, center it, chock it and raise it one foot. Stop, walk around and look at every cable, sheave and post. Raise another foot and repeat until you reach working height, then lower it onto the locks. Never leave a vehicle sitting on hydraulic pressure alone. If everything looks and sounds right, your 4 post car lift installation is complete.
Post-Installation Checklist and Maintenance
New cables stretch during the first few months of use. That is normal, but it means the lift you tuned perfectly on day one needs a follow-up. Here is the schedule I give every owner.
| When | What to Check |
|---|---|
| Day 1 | All four locks engage together at every height; anchors torqued; hardware torqued; fluid topped off; no hydraulic leaks |
| After 1–2 months | Re-tension equalizer cables; re-check lock timing; re-torque crossbeam and anchor hardware |
| Monthly | Inspect all four cables for broken strands, kinks or fraying at the sheaves; check fluid level and fittings; grease sheave pins; wipe slider blocks |
| Quarterly | Confirm locks still engage in unison; re-torque cross rail hardware; check shims have not shifted under base plates |
| Yearly | Full cable re-tension; inspect hydraulic hose for cracks; replace cables as a set if any strand is broken |
Common 4 Post Lift Installation Mistakes to Avoid
- Measuring the ceiling at the peak instead of at the garage door track or opener rail.
- Skipping the slab check. Thin or cracked concrete is the number one reason a lift has to be moved after installation.
- Torquing the frame before it is square. The runways will not fit and you will be loosening everything again.
- Cutting straps before inventorying the shipment. Freight damage is on you once you sign clean.
- Skipping a sheave or crossing cables. Trace every cable with a flashlight before tension.
- Running the pump dry or using the wrong fluid.
- Using wood or washers as shims. They compress and the lift goes out of level.
- Using an impact wrench on anchors. Over-torqued wedge anchors crack concrete and lose holding power.
- Not re-tensioning cables after the first month. Uneven locks are a safety problem, not a cosmetic one.
- Sharing the electrical circuit with a compressor or using an extension cord.
DIY vs Professional Installation: Which Is Right for You?
| DIY Installation | Professional Installation | |
|---|---|---|
| Typical cost | Free (plus tools, hydraulic fluid and pizza for helpers) | $500 – $1,500 for a standard home lift, more for alignment racks |
| Time | 4 – 8 hours with 2–3 people | 2 – 4 hours with a trained crew |
| Equipment | You supply hoist, hammer drill, torque wrench | Crew brings everything |
| Warranty | Usually fine for home lifts; check your manual | Required by some brands and for commercial ALI certified installs |
| Best for | Handy owners with help and a good slab | Heavy lifts, questionable floors, no helpers, tight schedules |
If you already have the tools and the help, installing a 4 post lift yourself is very doable and saves real money. If you are choosing between lift styles, keep in mind a 2 post car lift must be anchored into a thicker slab and is far less forgiving of a DIY installation than a free standing 4 post.
Frequently Asked Questions
How long does it take to install a 4 post car lift?
With two or three people, the right tools and an engine hoist to move the runways, a standard home 4 post lift takes 4 to 8 hours to assemble, level, anchor and test. A professional crew usually finishes in 2 to 4 hours. Add time if you need to shim a sloped floor or wait for an electrician.
How many people does it take to install a 4 post lift?
Plan on at least two people, and three is better. Posts weigh 100 to 200 lbs each and a runway can weigh around 400 lbs, so you need help to stand posts, hold crossbeams and guide runways safely even if you have a hoist.
Does a 4 post car lift need to be anchored to the floor?
Most home storage 4 post lifts are technically free standing and some owners run them unanchored so they can move the lift with casters. However, nearly every manufacturer recommends anchoring, and it is required for commercial use, alignment lifts and ALI certification. An unanchored lift can shift under an off center load.
How thick does concrete need to be for a 4 post lift?
The typical minimum is 4 inches of 3,000 PSI concrete cured for at least 28 days. Some manufacturers specify 4.25 inches, and heavier 12,000 lb and up lifts often require 6 inches. Never install on cracked concrete, asphalt or a post tension slab without an engineer’s approval.
What ceiling height do I need for a 4 post car lift?
A standard 4 post lift with about a 72 inch rise needs roughly 11 to 12 feet of clear ceiling to stack two average vehicles. Many standard lifts will physically fit under a 9 to 10 foot ceiling but you will lose usable lift height. Always measure to the lowest obstruction such as the garage door track or opener.
What kind of hydraulic fluid does a 4 post lift use?
Most manufacturers approve general purpose ISO-32 (AW-32) or ISO-46 (AW-46) hydraulic oil, and many also approve Dexron III, Dexron VI or Mercon V automatic transmission fluid. Check your manual, and never run the power unit without fluid. Most home lifts need 3 to 4 gallons.
Can I install a 4 post lift on a sloped garage floor?
Yes, within limits. Most manuals allow a maximum slope of about 3 degrees and require you to shim the low posts with the steel shims supplied so the runways are level. If your floor slope exceeds the limit, you will need to pour level pads for the posts or have the floor leveled.
Final Thoughts
Installing a 4 post car lift is one of the more satisfying weekend projects a gearhead can take on. Check your concrete and ceiling before the truck arrives, keep the frame finger tight until it is square, trace every cable, plumb and shim each post, and make sure all four locks click together before you ever put a car in the air. Do those things and your lift will feel like a professional install, because it is one.
Still deciding which lift to buy? Our guide to the best 4 post car lifts covers the models that are easiest to install in a home garage, and if you are not sure whether to bolt yours down, read does a 4 post car lift need to be anchored before you drill.
My advice after all these installs: budget a full day, bring a friend who owns a torque wrench, and never rush Step 9. Cables that lock together evenly are the difference between a lift you trust and one you tiptoe around.
GarageGear Team